MeetingPlaza has two recording modes,
(1) Local recording (saved to your PC)
(2) Server recording (saved to MeetingPlaza server)
The following describes the recording function.
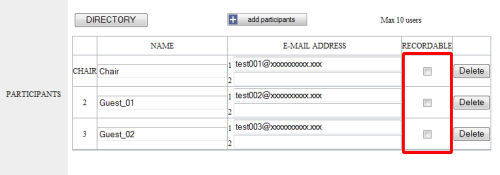
All users can not record, only user given the authority at the time the conference is scheduled or the team room members can record the meeting (Refer to details to Chapter 8-6.
When the conference is scheduled those who have the ability to record the meeting are designated with a (on) ![]() next to their name in the participant list.
next to their name in the participant list.
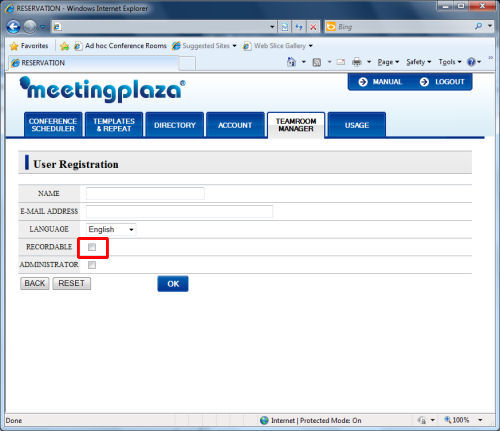
When setting up a uses for the team room you have the administrator of the account can grant recording privliges by checking the recordable box (on) ![]() when the user is registered.
when the user is registered.
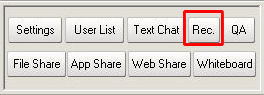
To record a conference click on t record button in the function box
Standard

"Discussion", "Seminar", "V5standard"

Easy

Classic
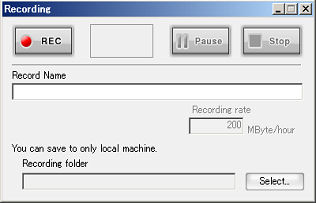
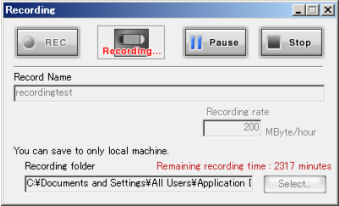
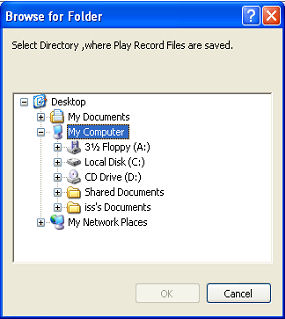
The record window is opened and the user can designate where the recorded files are to be stored.
Records do not specify a folder, please note that recording will not start.
The Record Name is used in the conversion to an AVI file once the recorded data is saved
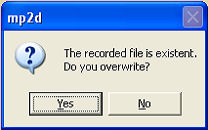
Only on recorded conference can be saved in a folder.
A second folder is need if a second conference is to be recorded.
When recording has begun, the record button is active. To stop recording click the pause button, to begin recording again click the pause button. To end the recorded session click on the stop button
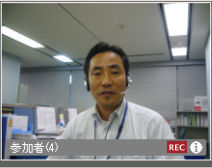
We are recording a user, in the lower right "REC" is displayed and can be seen from the recognition by other users.
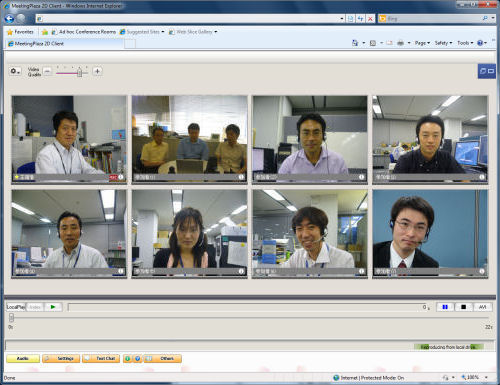
Access the following URL. To replay the recorded conference.
http://'your server name'/recmgr/localplay.cgi
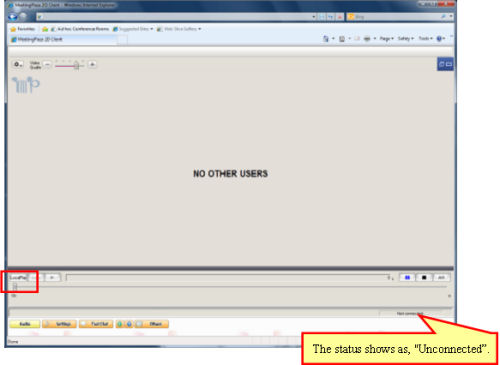
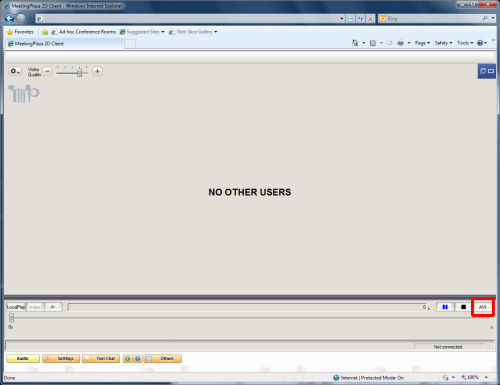
Click on the local play button and select the folder where the information was saved to and click OK view the recorded conference.

The function of the button in this window is as follows.
| Button in window | Operation and function when click or selecting it |
|---|---|
| Image quality setting bar | The image quality when replaying can be adjusted. Please see Chapter 5-2-5 in detail. |
| Local reproduction | The record folder is selected. |
| Index | Allows one to select the a given point in the video |
Play |
Start the recording. |
Pause |
Stopped temporarily the recording |
End |
End the recording |
AVI conversion |
Convert the recorded conference to an AVI file. |
Slider |
The recorded point can be changed by moving the slide. |
Voice setting |
Setting the volume of the recording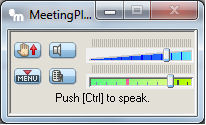 |
Setting |
This function button does not effect the recording of the conference.
 |
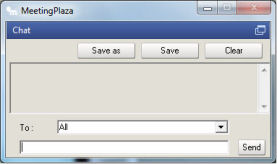
Chat |
The text chat window is opened automatically.
 |
Information |
The information window is opened.
 |
Help |
The Web page in which the manual is published is opened. |
Others |
The menu that inquires, and is composed of the item of the screen design and the IE setting is displayed. |
Please note that that shared files may not show when the position of the video file is move on playback.
MeetingPlaza has the ability to convert the recorded conference into AVI format. Thje AVI file produced can also be edited with software and displayed using Windows Media Player.
Only voice and video can be converted to the AVI format. Shared files and chat windows are not converted.
The conversion procedure for AVI format is described below.
Open your browser and go to the following URL:
http://'your server name'/recmgr/localplay.cgi
Click on the AVI button.
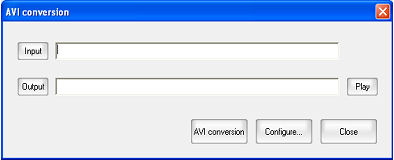
Because the following windows are displayed, the folder name for the input and output files are designated.
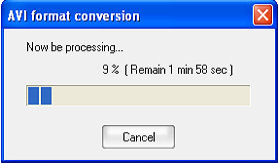
AVI conversion begins by clicking on the AVI conversion button.
As the file is being converted progress is shown in the processing window
When AVI conversion ends, the following window is displayed. The AVI file can be viewed by clicking on the "play" button.16
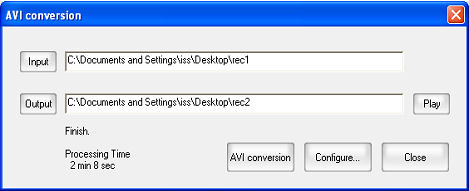
Conversion time and play quality is dependent on the computer speed
The following window is displayed when the setting button in the AVI conversion window is clicked. The AVI conversion parameters can be specified.
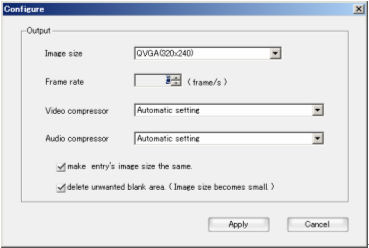
The function of the button and the menu in this window is as follows.
| Button and menu in window | Operation and function when click or selecting it |
|---|---|
| "Image size" | There are eight image sizes (side x length), that are available, SXGA(1280x1024), XGA(1024x780), SVGA(800x600), VGA(640x480), CIF(352x288), QVGA(320x240), QCIF(176x144), and QQVGA(160x120). |
| Frame rate | The frame rate can be set to 1-30 frame/second. |
| Video compression | The video compression (compression method of the image) is set. Please refer to Chapter 7-4-3 for details. |
| Audio compression | The audio compression (compression method of the voice) is set. |
| The image size of the participant is made the same. | All image sizes are expanded to the same size when the image size of the conference participant (eight times, four times, and twice and standard screens) are different. |
| "All unnecessary blank is deleted (The image size becomes small)" | All blank areas in the browser are deleted. |
The video compression (compression method of the image) is set. The necessary video compression codec must be installed on the computer doing the conversion.
| Video compression | Explanation | type of video CODEC |
|---|---|---|
| Automatic setting | The codec that can be used is automatically set. | |
| Microsoft MPEG-4 V2 (compressibility valuing) |
The compressibility is valued. | Microsoft MPEG-4 Video Codec V3 |
| Cinepak (interchangeability valuing) | Interchangeability is valued. | iccvid.dll |
| IndeoR 5.10 (image quality valuing) | The size of the file is valued. | IndeoR video 5.10 |
| Microsoft Video 1 (speed valuing) | The processing speed is valued. | msvidc32.dll |
| No compression | It doesn't compress it. The image quality is not deteriorated. (Please note that the size of the file grows very much. ) |
(1)Reference
"Hardware" tab can be selected for Windows XP by "Control panel" -> of "Setting" -> of "Start" ->"System", "Device manager" be left-clicked, and the property of "Video CODEC" of "Sound, video, and game controller" confirm "Mark of the property of video CODEC" by the device manager. As a result,the installation of the video compression is confirmed.
The audio compression (compression method for voice) is set as follows
| Audio compression | Explanation | property of audio CODEC |
|---|---|---|
| Automatic setting | The codec that can be used is automatically set. | |
| Microsoft ADPCM (tone quality valuing) | Tone quality is valued. | msadp32.acm |
| GSM 6.10 (valuing of size of file) | The size of the file is valued. | msgsm32.acm |
| PCM (no compression) | Tone quality is not deteriorated. | Microsoft PCM Converter |
Reference
"Hardware" tab can be selected for Windows XP by "Control panel" -> of "Setting" -> of "Start" ->"System", "Device manager" be left-clicked, and the property of "Video CODEC" of "Sound, video, and game controller" confirm "Mark of the property of audio CODEC" by the device manager. As a result, the presence of the installation of the audio compression is understood.
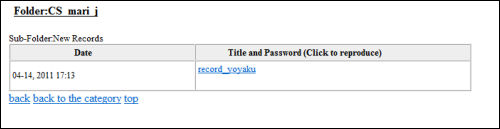
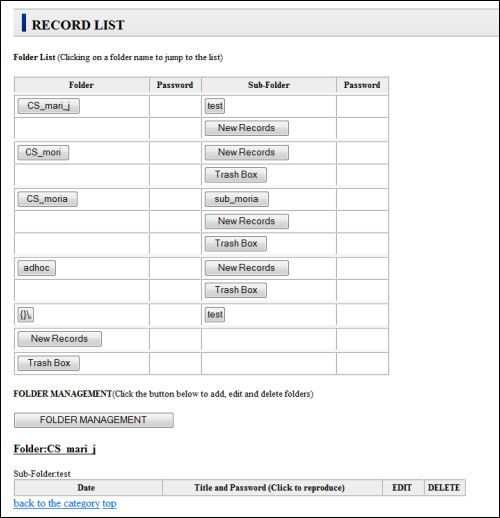
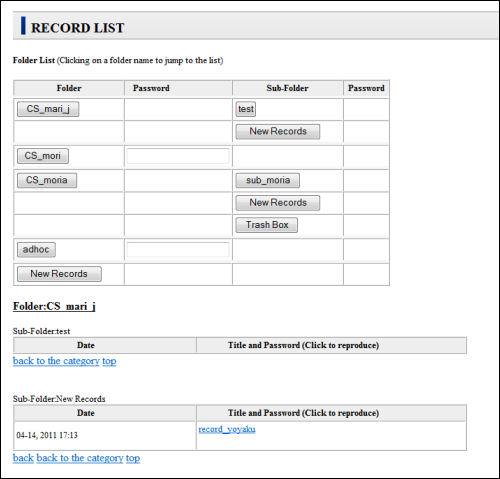
In the MeetingPlaza Record and Reproduction sub-system, the records are stored in a fixed structure similar to the directories in your computer's file system. The structure consists of two level folders: the higher one is called 'Folder' and the lower one is called 'Sub-folder' (see below).
-Folder
-Sub-folder
-Record
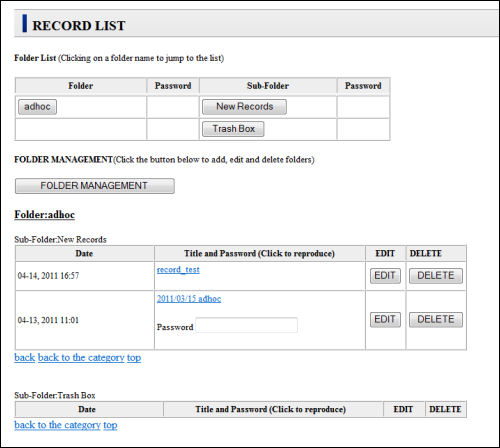
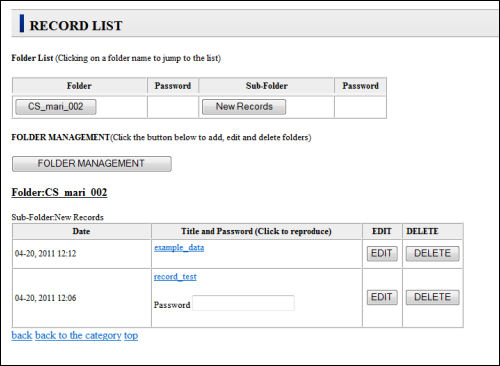
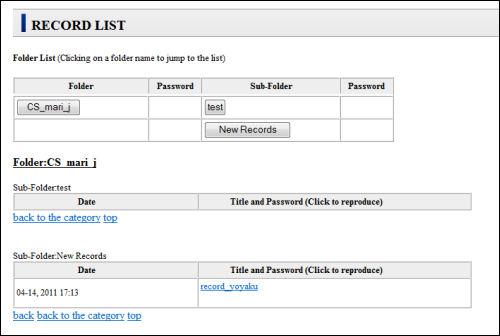
When a session is recorded to the MeetingPlaza VR Server, the record is stored in a 'New Record' sub-folder under a folder specified during the session. When the session is an 'Ad hoc Login Tool' session, the folder name is 'ad hoc'. When the record is created within a Conference Scheduler session, the folder name is CS_'the Conference Room Manager ID' (e.g., when the ID is '100' then the folder for the records is CS_100).
There are five types of login accounts for Record Reproduction and Management.
| Account Type | Records Available to the Account | Available for Edit? | Available to View? |
|---|---|---|---|
| System Record Administrator | All records. Only one Administrator account is allowed. |  |
|
| Ad hoc Room Record Manager | All records made using the Ad hoc Login Tool. Only one Ad Hoc account is allowed. | |
|
| Conference Room Record Manager Registration and modification on this account is done through the Conference Scheduler |
Only records taken in the corresponding conference room. | |
|
| Conference Room Record Viewers Registration and modification of these accounts is done through the Conference Scheduler |
Only records taken in the corresponding conference room. |  |
|
| Record Viewer | All records. | |
|
The System Record Administrator can create folders and sub-folders and move records. Conference Room Record Managers and Ad hoc Room Record Manager can only create and modify the sub-folders under their corresponding folder.
Please note that if the System Record Administrator moves a record of a particular Conference Room from one folder to another, that record can no longer be retrieved by the Conference Room Record Managers and Conference Room Record Viewer for the conference room.

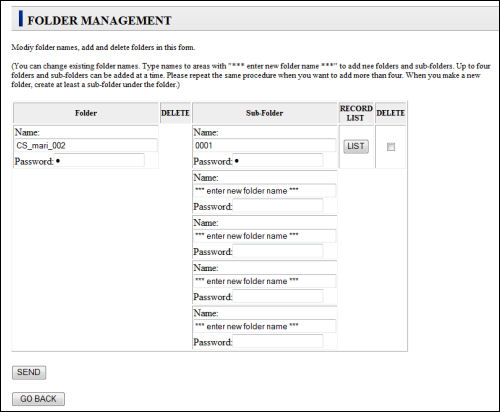
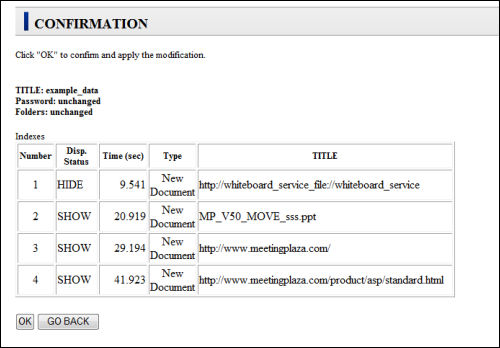
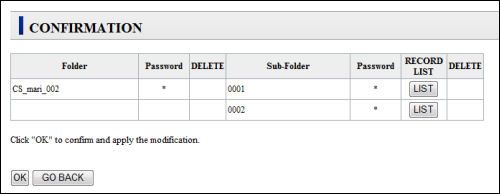
| Create | Type the name of the new folder in the Name textbox. You need to create at least one sub-folder in each new folder. |
| Update | To update the name of folders or passwords, simply make the appropriate changes in the text box. |
| Delete | Check Delete to delete the corresponding folder.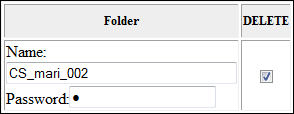 |
| Addition | Type the name of the new folder in the Name textbox. You need to create at least one sub-folder in each new folder.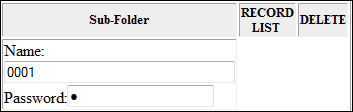 |
| Check | The List button brings up a separate window showing the records in the sub-folder.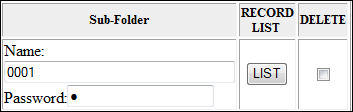 |
| Delete | Check Delete to delete the sub-folder.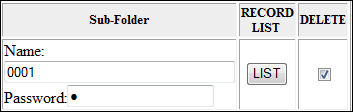 |
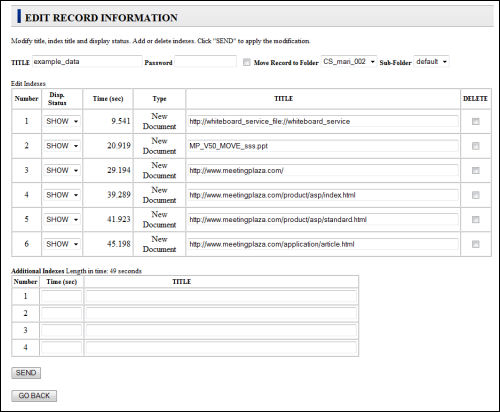
| TITLE | The Title of the record |
| Password | Password required to access the record |
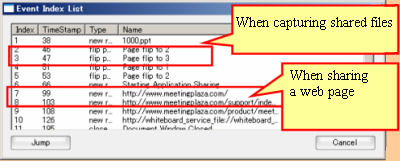
| Indices | The reference points during replay. |
| Additional Indices | Any additional reference points specified by time for the recording session. |